Production Stills by Hua Bai
Friday, January 31, 2014
Wednesday, January 22, 2014
Lesson 1 Window Light Simulation
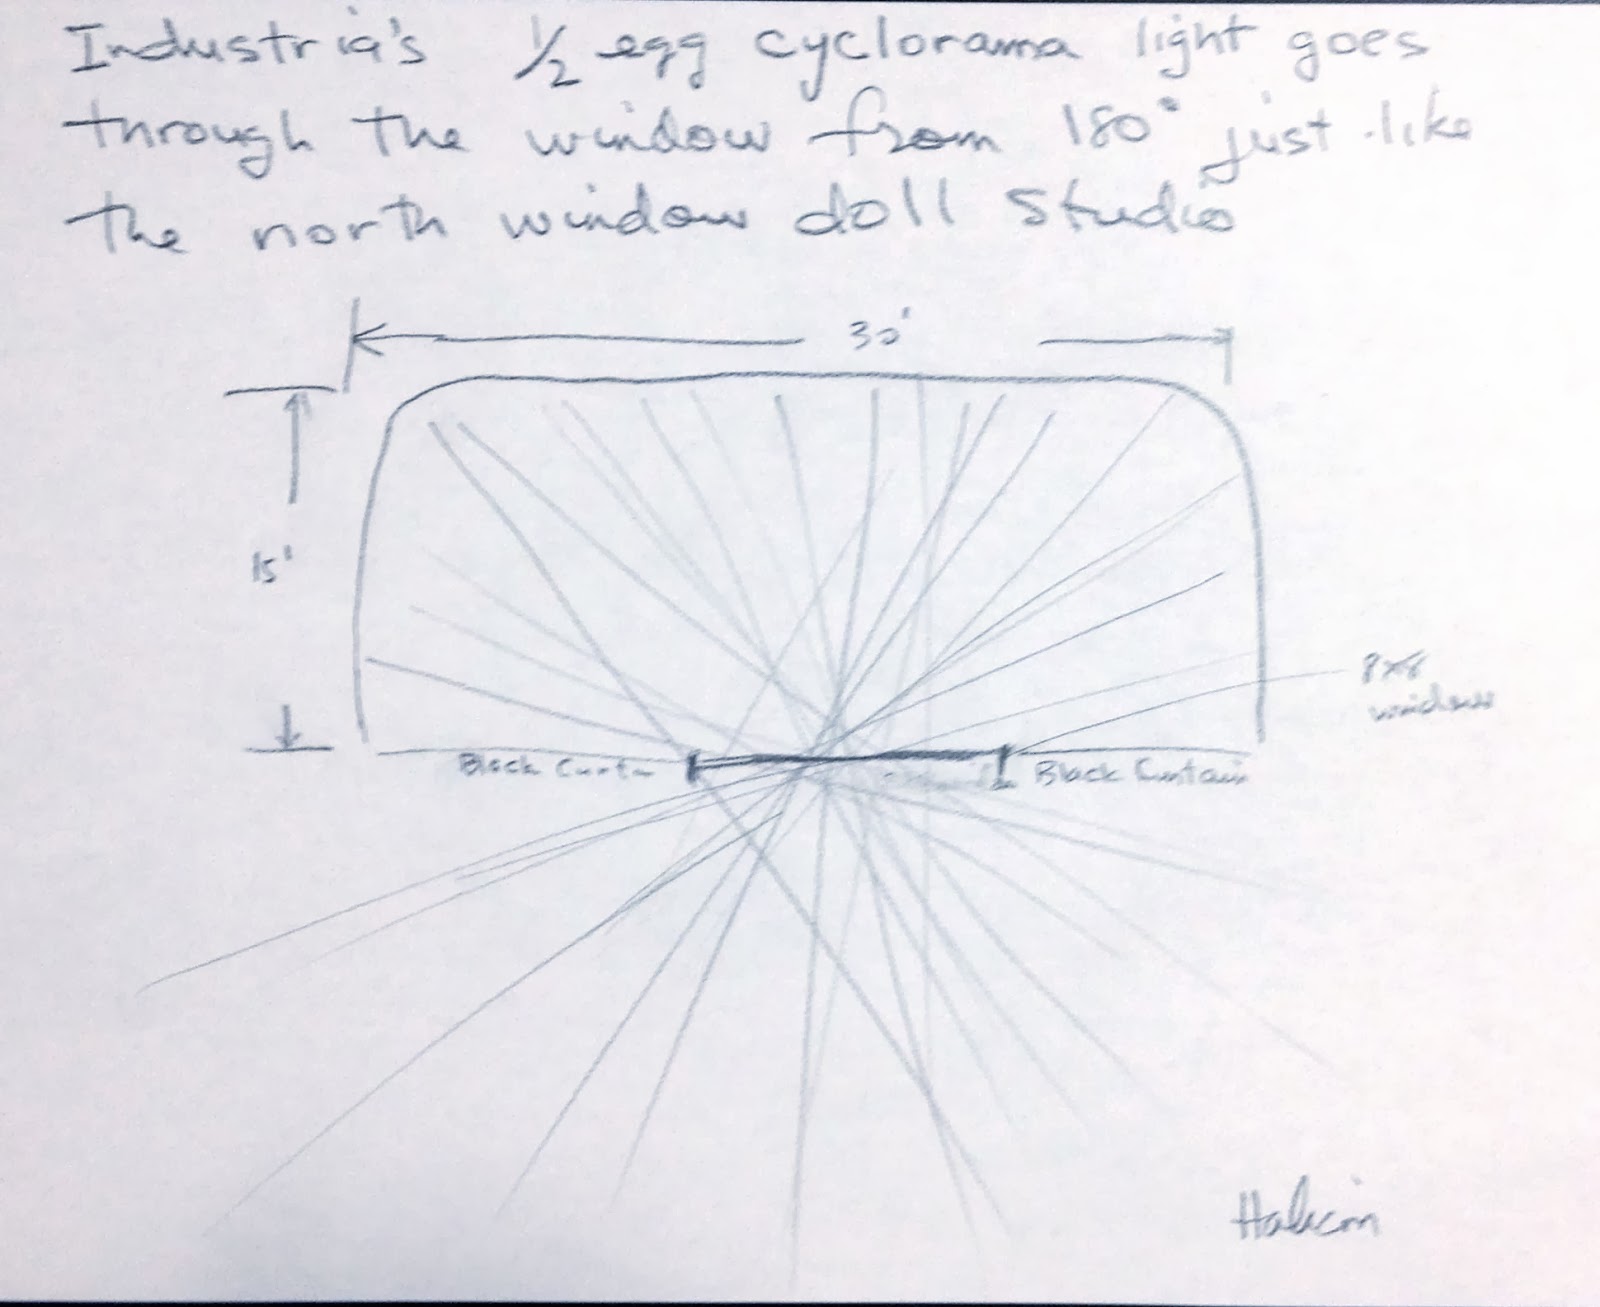
I wanted to see if the distance of the source of lighting from the window opening in this window light simulation mattered as far as the quality of light and the inverse square law was concerned. In one example I lit the 15x12x30 cyclorama at Industria's studio 2 and placed the 8x8 window frame at its edge. In the next example I hung 2 bed sheets in front of the window frame so that the light source was the bed sheets instead of the back of the cyclorama which was 15 feet away. The quality of the light and the action of the inverse square law were exactly the same. I was surprised so performed the next experiment below.
Below are the comparison of one image shot with the 6x6 butterfly (the top part of the setup was turned off) and the other image shot with the octabank. I included 3 magnifications to better see the differences. Pretty close I'd say.
Production stills by Ash Smith
Tuesday, January 14, 2014
Assignment 1 Photograph to Emulate
Working in a group, make a photograph in the studio using whatever lighting you would like. Capture with the Phase One camera/back and the Capture One software. Post the picture on your blog and identify it as Assignment 1.
Create a blog on bogger using your google account and use the simple template.
Send the url for your blog to ccs@nyc.rr.com by next Monday.
Post a photograph that you would like to emulate the lighting.
Make a sketch how you think the photographer achieved the light.
You can make the sketch hand draw or use this template:
http://www.diyphotography.net/lighting-diagrams
Class Syllabus
Instructor: Chris Callis
ccs@nyc.rr.com
718-638-5150 Work
 718-938-9871 Cell
Solving the Mysteries of Light
Wednesdays 3pm-5:50pm
Location: MFA Photo Studio Room 109
Class Description:
This class is an advanced lighting class and a student should have knowledge of basic lighting techniques and equipment. The goal of this class is for each student to develop their own unique lighting style. This will be achieved through discussions of photographs that students will post on their blog with his or her best evaluation of how that lighting was achieved. Every week there will be a lighting demonstration.
Assignments:
Each week every student will post a photograph that they wish to emulate the lighting of, along with a sketch showing the student’s best assessment of to how the lighting was achieved. Through class discussion, a new sketch of the lighting will be developed. An individual assignment will
be given to the students based on the photograph they brought to class along with the revised lighting sketch that evolved during class. The assignment will be due the next week. A blog will be kept showing the development of each student’s lighting throughout the semester and it will include the photographs that were posted, sketches of the lighting plots, revised sketches from class discussions, and the photographic results of each individual assignment. The blog organization will comprise a portion of the student’s grade.
Grading:
All assignments (a total of 13 emulations) must be completed by the end of the semester.
Grading will be based on achievement.
ccs@nyc.rr.com
718-638-5150 Work
 718-938-9871 Cell
Solving the Mysteries of Light
Wednesdays 3pm-5:50pm
Location: MFA Photo Studio Room 109
Class Description:
This class is an advanced lighting class and a student should have knowledge of basic lighting techniques and equipment. The goal of this class is for each student to develop their own unique lighting style. This will be achieved through discussions of photographs that students will post on their blog with his or her best evaluation of how that lighting was achieved. Every week there will be a lighting demonstration.
Assignments:
Each week every student will post a photograph that they wish to emulate the lighting of, along with a sketch showing the student’s best assessment of to how the lighting was achieved. Through class discussion, a new sketch of the lighting will be developed. An individual assignment will
be given to the students based on the photograph they brought to class along with the revised lighting sketch that evolved during class. The assignment will be due the next week. A blog will be kept showing the development of each student’s lighting throughout the semester and it will include the photographs that were posted, sketches of the lighting plots, revised sketches from class discussions, and the photographic results of each individual assignment. The blog organization will comprise a portion of the student’s grade.
Grading:
All assignments (a total of 13 emulations) must be completed by the end of the semester.
Grading will be based on achievement.
Subscribe to:
Comments (Atom)


